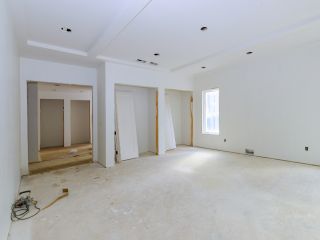
Drywall installation may seem like a straightforward task, but achieving a smooth, seamless result requires skill, attention to detail, and the right approach. Whether you're renovating a room or working on new construction, following expert guidelines can make all the difference in the quality and longevity of your drywall. Below, we share some essential tips for ensuring your drywall installation project in Encino goes off without a hitch.
1. Choose the Right Drywall for Your Project
Before you start hanging drywall, it's important to select the correct type for the specific needs of your project. For example, standard drywall works well for most interior walls, but in areas with high moisture like bathrooms and kitchens, moisture-resistant drywall (also known as "green board") is a better choice. For spaces that require fire resistance, such as garages, fire-rated drywall should be installed to meet local building codes and ensure safety.
Using the appropriate drywall will prevent future issues like mold growth or structural damage and ensure that your installation stands up to environmental factors. The Federal Emergency Management Agency (FEMA) offers guidelines on selecting drywall for different conditions, which can help you make informed decisions.
2. Measure and Cut with Precision
Accurate measurements are crucial to ensuring that your drywall panels fit correctly and minimize waste. Measure the wall dimensions carefully and transfer those measurements to the drywall sheet. Use a utility knife to score along the marked lines and then snap the drywall to create a clean edge.
When cutting around electrical outlets, windows, or doors, take your time to mark the exact location before cutting. Accurate cuts will make the installation process smoother and help avoid gaps that can lead to costly repairs later.
3. Hang Drywall Sheets Properly
Proper hanging of drywall is key to a successful installation. Start by securing the drywall sheets horizontally to the framing, ensuring that each sheet is properly aligned. Use drywall screws instead of nails to minimize the risk of "nail pops" and ensure long-term durability. Screws should be spaced about 12 inches apart, and be sure not to overdrive them, as this can damage the drywall's surface.
In addition, stagger the seams of your drywall sheets to avoid creating long vertical seams, which can weaken the overall structure of the wall. By staggering the joints, you distribute the stress across the surface more evenly, reducing the likelihood of cracks and imperfections.
4. Taping and Mudding with Patience
The taping and mudding phase is where the quality of your drywall installation truly shows. Use joint tape to cover all seams, ensuring that it’s embedded in a layer of drywall compound (mud). Apply the first coat of mud and allow it to dry completely before applying subsequent coats. Sanding between coats is essential for smoothing out any ridges or imperfections.
While it may be tempting to rush through this step, taking your time will yield better results. Be sure to feather the edges of the mud with each coat to create a smooth, invisible transition between the drywall sheets.
5. Proper Sanding for a Smooth Finish
Once your final coat of mud has dried, sanding is necessary to achieve a smooth finish. Use a fine-grit sandpaper or a sanding sponge to gently sand the drywall surface. Keep the pressure light to avoid over-sanding, which can damage the surface and create more work for you later.
If you're working in a larger space, using a pole sander can help speed up the process while ensuring even results. Don’t forget to wear a dust mask and goggles during this step, as drywall dust can be hazardous when inhaled.
How Drywall Repair Encino Can Help You
Drywall installation can be challenging, especially for those who are new to the process. Even seasoned DIYers can run into unexpected issues. That’s where Drywall Repair Encino comes in. Our team of experienced drywall professionals is here to guide you through every phase of your installation project, ensuring a smooth, professional result.
Whether you need help choosing the right drywall materials, hanging sheets, or perfecting the finish with taping and mudding, we've got you covered. We understand the unique needs of Encino homes and have the expertise to address specific challenges such as moisture issues or structural concerns. Contact us today to schedule a consultation and take the first step toward flawless walls and ceilings.
Call to Action:
Ready to get started with your drywall project in Encino? Let the experts at Drywall Repair Encino assist you in achieving perfect results from start to finish. Contact us today for a free consultation and learn how we can help transform your home with professional drywall installation and repair services.

